From the moment I took my first lesson and up to now, my lampwork studio has changed several times. In the beginning, I had a million questions and spent a lot of time researching how things were done and how I should set up my own studio.
Questions like how much does all the equipment cost and what all do I need? Is it expensive? How do I set it up? Do I need a kiln? How do I set up my ventilation?
If you're reading this, then you're interested in learning how to set up your own lampwork studio and while it can be daunting but with these tips to get you started, you'll be on your way to creating beads in your own lampwork studio! There are some key things to consider when setting up your studio, so let's break it down and take a look at each one.
1: How much space do you need?
Studio space can come in a variety of different shapes and sizes, but it is important to make sure that you have enough room to work comfortably. An easy way to figure out how much room you'll need is to create a checklist, then create a layout. Will you have a kiln? Do you have a dedicated space to work that doesn’t need to be disassembled regularly?
I suggest you budget at least 6’x6’ for your workspace - this gives you enough room for a table to work on and room around you to move.
This will also allow you the additional room you will need for a tabletop kiln. Your space should have a window in front or beside you and if possible a window or door somewhere close by to provide your make-up air. If you have chosen to add a ventilation system, a window or door will provide you with the necessary make-up air.
If you chose to create a studio space where you can display your beads so people can come and see your work then you may want a bigger space. I’ve seen so many beautiful workspaces and studios that creative lampworkers have constructed, some that will blow your mind. It’s all about what you want but if you’re just starting out start off with what you need.
2: Lighting and flooring
Good lighting is necessary in order to see what you’re doing. Your didymium glasses are dark and without good lighting, you won’t be able to see the detail of what you’re working on. A lamp or lamps overhead will generally be sufficient and if you have a window close by you will benefit from direct sunlight. My workstation has a combination of incandescent lamps that clip onto the hood above me and point toward my torch and overhead fluorescent lighting.
Flooring is dependant on where you will construct your workspace. If you are on a cement or tile floor as I am in my basement, you may want to add a matt under your feet, primarily to keep your feet warm, or for comfort where ever you may need to stand. Keep in mind that hot glass IS going to fly all over. If you have carpet in your workspace it will eventually show the burns of flying glass, if you have a wood or linoleum floor it would be practical to cover it with a matt to protect it.
3: Ventilation
Ventilation is one of the most researched questions in lampworking when setting up a workspace. It is one of the most important pieces of equipment you will need if you are working inside. It can be simple and inexpensive and it can be complicated and expensive. The purpose of ventilation is to evacuate the fumes from the torch and the glass out of your workspace. I've seen ventilation setups such as working in a garage with the garage door open or a covered patio and these are good options because you are ventilating your workspace but they are also weather dependent meaning in the winter or the rain it's cold and/or wet so your work time is limited, your glass is cold and takes longer to warm up, your workpiece will cool off a lot faster. Not the best option if you're building a sculptural or detailed piece.
Ideally, whatever room or space you use for your setup, you want a window or door behind you to bring in the replacement air. My workspace is 6' x 8'. It's in my basement and is where the bathroom would be if we had one in the basement. I use the "bathroom" window to vent my fan and I have a door to the garage in front of me, a window to my other side and a door behind me. I created the ventilation set up I have now by using a 10" inline duct fan, the ones you find at "garden centers" and I've attached it to a kitchen hood fan and about 4 feet of ducting. The ducting is attached to a piece of plywood cut to fit in the window and has a handhole I can access to open the window to vent the fan. I put a mouse pad over the hole so the exhaust doesn't come back into the workspace. I have a variable speed controller connected to the fan so I can dial it down to low or up to high. it sounds like a jet engine at high :). It hangs about 18" over my torch. My entire ventilation setup cost roughly $250. The inline fan was the most expensive but all of the parts needed were second-hand/used. Good deals come to those who look for them.
There are numerous tutorials and websites linking to some very important information about choosing the right ventilation system. Please see the links below.
- Studio Ventilation Tutorial by Whit Slemmons
- http://www.michelsun.com/art-blog/2014/3/4/lampworking-ventilation-guide
- https://mikeaurelius.wordpress.com/ventilation-primer/


My studio setup from 2012. I’ve made small changes to the workspace since then. It’s not pretty but it’s functional.
4: What kind of tools do you need?
A TORCH
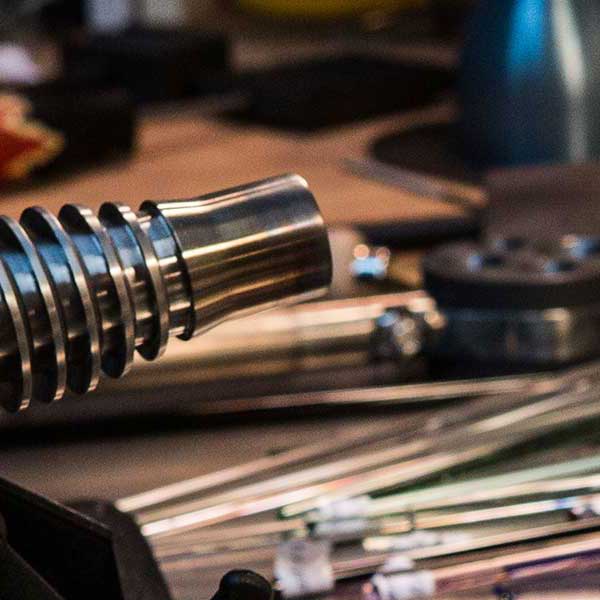
My torch, pictured here, is a Bethlehem Bravo. It runs on tanked oxygen and propane. It Rocks!

Torches come in all shapes and sizes. When you took your first lampworking lesson you may have used a Hot Head torch.

A Hot Head torch is a single fuel torch that runs on propane. I used to love that it ran off of those little propane cylinder used for your barbecue.
Pros
- A Hot Head torch will run approximately $50 plus the hose set and torch holder.
- It is economical because you can hook it up to a tank of propane you use for your barbeque.
- This torch is ideal for intricate detail work because you would be working cooler.
Cons
- It is not suitable for melting borosilicate glass as it doesn’t generate the heat a dual fuel torch does.
- A Hot Head torch is noisy!
A dual fuel torch is a next step up in torches.

The benefits of a dual fuel torch are:
- they are quieter
- they are hotter so you can work with the harder glass types
- the flame can be adjusted for different flame configurations needed for some of the reactive glasses
- the flame can be adjusted down for finer detail work or up for more heat
The cons of a dual fuel torch are:
- they are more expensive and they require more equipment to set up
- they require an oxygen source such as a bottle of oxygen or a concentrator (more on these options below)
- they are hotter – if you are used to working in a cool flame you will need to re-learn your heat control.
Note: you need to consider your fuel requirements when purchasing a dual fuel torch.
A FUEL SOURCE
One major piece of equipment needed in a lampwork studio set up is the fuel source. Larger dual fuel torches require propane and oxygen, however, they can be set up to run on natural gas and oxygen. The source for the gas is easy in that you can use a 20-litre barbecue tank but the oxygen source is generally the more expensive part.

Concentrators are used to produce the oxygen required to run a dual fuel torch unless you choose to use tanked oxygen (more on that below). Selecting a concentrator is based on the size of your torch. A Minor torch can easily run on a 5 litre concentrator. check your torch settings for the correct configuration. if you have a larger torch it is possible to link several small concentrators together for more oxygen output (higher psi). Larger torches require a larger output so concentrators needing up to 20 psi of oxygen can get expensive and linking 4 smaller ones together will take up a lot of room and eventually cost you as much as selecting the large concentrator.

Tanked oxygen is ideal because it will provide you the needed psi based on your torches settings. A tank of oxygen, depending on it’s size, can last you a long time before refilling is required. It is however an investment. While you can open an account with a local welding product supplier, the cost of the rental, the fill and the delivery can add up.
A KILN

Part of your space requirement is based on what equipment you need to put in it. A kiln is a larger piece of equipment in that it gets hot and may require a little more space between it and you. Most kilns are designed to sit on a tabletop. When you search for a kiln, you want to look for a beadmakers kiln. This is a kiln with a front door aka: a bead door. Having a bead door helps keep the heat in the kiln whereas a top-loading kiln would lose a lot of its heat every time you open the top to add another bead. It is extremely helpful to have a kiln with a programmable temperature control. This feature adds to the price of the kiln but is a huge benefit in helping you maintain the temperature for garaging and annealing your beads.
Below are a few links to the most popular kilns.
Skutt Kilns
Paragon Kilns
Jen-Ken Kilns
SMALL HAND TOOLS

- mandrels
- a dozen mandrels in either 1/16 or 3/32 diameter x 12″ long. 3/32 diameter are the easiest to use when you are starting out. They cost anywhere from $0.20 – $1.50 each. You can make your own by cutting down stainless steel welding rods
- bead release – needed for dipping your mandrels so you bead can be released from the mandrel
- a marver
- a marver – a flat rectangular marver is easy to use and inexpensive. A marver is handy for shaping the hot glass. They price around $15 each
- fiber blanket or vermiculite
- a ceramic fiber blanket or bucket of vermiculite. A fiber blanket is used when you don’t have a kiln or prefer to batch anneal your beads. A fiber blanket allows the bead to cool slowly. They are priced around $10 each
- metal tweezers, pokers, dragging tools
- these types of tools are nice to have but not ultimately show stoppers. These tools are used to manipulate your glass in one way or another. Tweezers are beneficial when pulling stringer or cleaning the end of a hot glass rod. Pokers and pointy tools are used to manipulate you bead or bead design. Once again not mandatory but nice to have.
- didymium glasses. didy’s as they are nicknamed are one of the more expensive items in your lampwork setup. These protect your eyes from soda flare and UV exposure. I would not suggest you work at the torch without proper eyeware. These will cost between $85-$125 each.
- a rod rest – this is a metal stand to keep your hot rods of the table top. It’s not a mandatory piece of equipment but you have less breakage of your hot rods when they are set to cool naturally rather than shocking them on a cold counter top. I use joist hangers for my rod rests.
Some glass and equipment suppliers offer a decent beginner kit, with a hot head torch, a small flat marver, some mandrels, a fiber matt, bead release, some basic glass, and Didymium glasses will get you started for approximately $200. Here is a link to kits for both a Hot Head Torch and a dual fuel torch. You can also get some great deals on equipment and supplies, including glass, at places like your local Buy & Sell, Facebook, and the lampwork forums.
All totalled, a lampworking studio setup will cost you $500+ before a kiln or concentrator so you really want to be sure lampworking is something you want to invest in before buying all the equipment. I recommend taking a lesson from one of your local artisans who teach from home and take note of their setup. Terminal City Glass Co-op is a member-driven glass arts facility in Vancouver. They offer studio time, equipment to work from, and lessons in both group and individual formats. They also have a hot shop if you find yourself drawn to glass blowing.
Conclusion
Setting up your own lampwork studio can be a daunting task. But, with the right tools and equipment in place, you’ll find it easier to get started on this rewarding craft! I hope was able to provide some helpful tips for setting up your new lampworking workspace safely and comfortably. If you want more information about the specific tools that will help make this process much smoother or have any other questions at all, don’t hesitate to reach out! I’m happy to help out where I can. If you found this post helpful, please click the LIKE button below.
Enjoy beadmaking!


